Saturday, October 30, 2010

We Lay The Last Stone

Approximately four months from the time we laid the first stone, we laid the last. It feels great to be moving on to a different phase of the project.

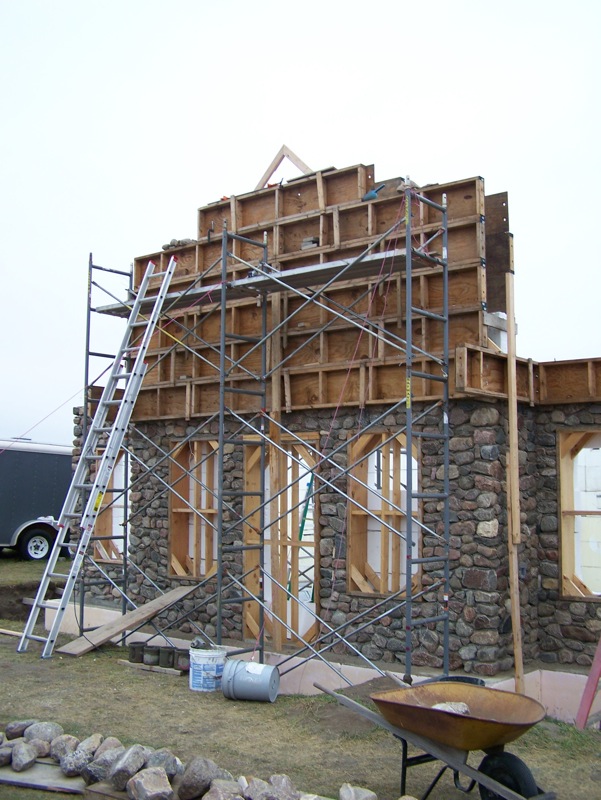
This is what it looked like after we finished for the night. We were really trusting our stone working skills, by finishing in the dark.

Then, we celebrated our success.

Today we began putting the GluLam beams into the pockets we made in the walls. FYI, if you need to make box outs for beam pockets in a concrete wall, don't use wood. If I had to do it all over again, I would try foam. The wood was jammed in there tight even though we oiled them before their use. It took us a long time to remove them.

With the help of good friends with strong backs, we picked up each beam and hefted them into place.

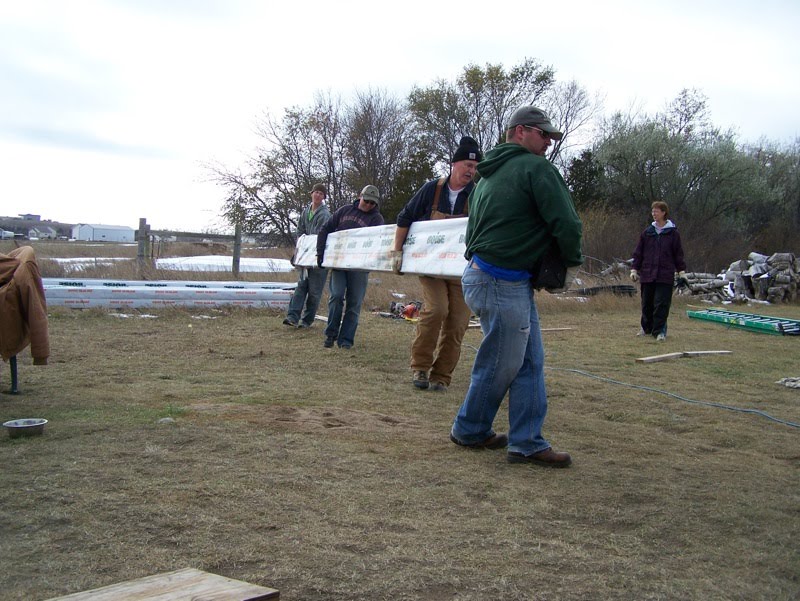


We wrapped the ends that would be inside the wall with roofing felt to protect them from condensation that can occur when wood comes into contact with concrete in the right conditions. We left the plastic wrap on to protect them from precipitation until the roof goes up.

Jenn was a master at stapling the felt on after wrapping them in Christmas present fashion.

We got 5 of the eight beams into place, we'll finish the rest tomorrow. There are four 21 footers and four 24 footers. We estimate that they weigh in at about 500 pounds or so. We were tired and very thankful for the help that showed up. Stay tuned for the reveal of the south gable.

Tuesday, October 26, 2010

The South Gable

After we finished all the stone work on the first floor. The only stone work left was the peak on the south side that extends up to the second floor. Due to the weather getting colder, we considered doing the peak in wood frame. Ultimately we couldn’t decide on a facing material that would equal the beauty of the stone. So stone it is. We also took a time out while the weather was warm to do some prep work on the back filling.

The peak went as fast as I expected it too, which was a comforting change to how things usually go.

We are using buckets and rope to get the rocks and concrete to the top.


The speed picked up even more after a surprise visit from my Aunt and Uncle. Thanks!


We are really racing the clock at this point. Not only are the temperatures getting colder, we also have much shorter evenings. Needless to say, we are very eager to set the last stone. We are very close to being able to put a roof on and make it weather tight.

Monday, October 18, 2010

The Process

I’ve been promising a few pictures of our actual stone laying process for a while now, and haven’t delivered. We are getting closer and closer to completion, so I figured I better snap a few.

Set the rocks.


Sand to a depth of about 1 inch. Poke holes in the sand marking the joints.


Cover with concrete.


The next set of rocks ideally covers the previous joints, using what masons call the “two over one, one over two” technique. Just like bricks.

We're living on borrowed time in our ND, fall climate - but we're getting close to being done with masonry work. More about that next time.

Monday, October 4, 2010

The South Wall

After topping the north wall we moved around to the south (and east) wall. This is very exciting to us since it closes off the stone portion of our house.

The south wall contains the bulk of the first floor windows to achieve maximum solar gain in our frigid North Dakota winters. Setting the window boxes is time consuming, but once they are in the wall takes a lot less concrete and stone.

Here's a look at the finished north wall. We put only one window on this side so as not to let in the cold winter winds.

Bailey found a new friend. She scared this little bugger out from underneath the trailer. Before we got a visual of it, we thought it might be a rattler. It was doing a darn fine impression. Turns out it was just a bull snake, a welcome rodent eater.

Here's some pictures of the progress.


Bailey's Queen of the sand pile.

This is a cross section of the wall that gives a glimpse of how it all goes together.

Thursday, September 16, 2010

We Top The North Wall

Last night we topped the north wall around the corner going south on the east wall. We began taking the forms off tonight, and then a storm rolled through. Weather delays at this stage of the game are really frustrating, but such is life. You can see from the pictures that we didn't even have time to wash all the sand off. We also got our septic system installed today, They came and went so fast that I didn't even get to take pictures. Anyway, not much else to say except that we are super excited to start on the south wall. From here on out, we start a series of 'lasts'. It's going to be fun to start closing the gap and making it look like a house. Here are some pictures of the progress.


Thursday, August 26, 2010

The North Wall

Even though it looks like not much progress has been made since the last blog, I swear we haven’t been slacking. Well, except for the blog author, he’s always slacking.


After we topped the west wall, we decided to work our way around the north wall, leaving the south wall for the grand finale. In order to do this we built up a small section on the east wall bringing it up to the four foot level of the north wall.


Setting forms where there wasn’t anything to set them on proved to be difficult. What we did was used 2x4 stilts. This in its self wasn’t the difficult part. What was tough was plumbing and leveling forms that were basically hovering in the air. Once we got everything straight and true, the pouring wasn’t anything different.


Also, in the spirit of multi-tasking, the well has been drilled and Jenn started doing the pointing. The well is 190 feet deep and the water line is fished in under the foundation. The water has been sent to the lab and we are eagerly awaiting the results.


It didn’t take Jenn long to get her pointing system down. Just like everything else, it takes longer than we would have thought but she’s getting pretty good at it. We plan to do a before and after of the pointing process, but we haven't gotten around to it yet.


Even Bailey came out to help.

Sunday, August 8, 2010

We Top The West Wall

Well, despite the heat and ridiculous humidity, our crew has completed a portion of our house all the way to the top. The west wall is topped. We leap frogged our forms up to the 9'4" total wall height using scaffolding and ladders. The work gets tougher the higher you get, but thankfully it's also exciting the closer you get to the top. The bandanas may make us look like really cool pirates, but they actually serve a purpose. It keeps the sun off my shaved head and allows more air flow than my ball cap, which I think just received it's sixth layer of dirt and portland cement. Oh and .... ARRRRR shiver me timbers!

In the last set of forms we embedded threaded rod into the wall every two feet. When the wall is completed all the way around, we will use the threaded rod to attach wooden sill plates in order to fasten the roof trusses.

Once the concrete was all the way to the top of the forms I used a piece of 2x4 to screed them smooth. I also troweled them to make them look more finished (I don't have a picture of that). I don't think it was necessary, but I had the trowel and I couldn't just leave it.

Today, we went out there and removed the forms so that we could ooh and ahh over our beautiful stone wall. We recovered most of the sand that was used to keep the concrete from oozing out all over the faces of the stones. What was remaining we hosed off so that the paparazzi could snap a few photos.

As a special feature, we placed a heart shaped stone over our first door box. We plan to put them over all the doors.

And, voila!

Oh look, it's the happy homesteaders in their natural environment.