Thursday, December 23, 2010

The Roof II

We have a roof! Toby and his crew did a great job building us a (very) solid roof. I guess this means that I have to get off my duff and get back on the project.

Here are some pictures that my Dad shot during the process. We're grateful for him being able to be there and take pictures for us.


We obviously need to cut some windows in on the second floor. But at this point, I figured it was more important to keep the weather out than to have the holes for the windows ready to go. Next, we'll start putting in the first floor windows and doors.

Saturday, December 11, 2010

The Roof

The contractor we hired to put the roof on, Tobias Marman Construction, began work this week. So far they've been great. I would recommend them to any owner-builder that may need some help with framing up their roof.

First they put down some OSB across the beams to give them a platform to work from.
They put in place the gable ends.
Then they got a crane service to come out to lift up the ridge truss.
They fit it into place.
And this is how far they got. Toby said they would likely be out on Monday to hit it hard again.

Monday, November 29, 2010

Putting The Roof On

For all intents and purposes winter is here in ND. Sure it is still technically Fall, but our daytime temperatures are no longer breaking 32 degrees. You would think that I would be really worried about getting a roof on our house. I would be, except after thought and consideration we decided to contract it out to a professional. Were it mid September I think we would have tried it ourselves, but at this stage of the game speed is important.

At first we contacted a truss company, but because of the complexity of the loads, they recommended having it hand built. They also recommended a framer. We couldn’t be happier with the contractor that is going to put the roof on. We haven’t seen his work yet, but he has been very easy to work with and very patient with us first time owner-builders.

Before he could get his job done we had a little work to do. We needed to put the wall plates on the top of our stone walls (I apparently forgot to take a picture of this, I will next time we go out). In order to do that, I ground down any high spots we had on top of the wall. This wasn’t rocket science but it was a dusty, messy job.


Once we had it ground down to an acceptable level, we proceeded with the plates. We chose to put down AC2 treated 2x12s. Normally I wouldn’t be a fan of treated lumber, but these days they say it is safe (no longer contains arsenic). I still wouldn't use it near plants or crops but in this application it seemed fitting. A note of caution here, only certain fasteners work with AC2 lumber. It can be corrosive so make sure you use approved materials such as hot dipped galvanized or stainless steel. Before putting the 2x12s on top of the wall we put on a double layer of 30 pound roofing felt. I call it cheap insurance against moisture.

We are also working on putting in the window and door bucks. I don't have photos of the complete process yet, but here is what it looks like when they are in. I will document the whole process in the next blog.


Saturday, November 6, 2010

Taking The Forms Off And Back Filling

After finishing the stonework, we had a date with the scaffolding one more time. We had to get all those forms off. It took some time but it felt good to be done with form work for the year.

Now that the walls are up we decided we better get the back filling done before winter rears its ugly head. The code book has a chart containing the R-Value and dimensions of the insulation required for frost protected shallow foundations. The chart references the amount of heating degree days in your area. You don't have to understand heating degree days, just be able to read a map.

We put in a loop of drain pipe around the footing to drain water away from the foundation. In order to maintain the right slope, our method was to snap a chalk line and then make a ridge out of gravel to rest the pipe on. It worked pretty well.

We also insulated the berm wall.

Then we called on Jenn's Uncle Tom to help us out once again. It was only fitting that the man that made the hole, filled it in.

He did a great job and this is what it looked like at the end of the day.

Here's our stonework with the forms removed and the sand washed off.


Saturday, October 30, 2010

We Lay The Last Stone

Approximately four months from the time we laid the first stone, we laid the last. It feels great to be moving on to a different phase of the project.

This is what it looked like after we finished for the night. We were really trusting our stone working skills, by finishing in the dark.

Then, we celebrated our success.

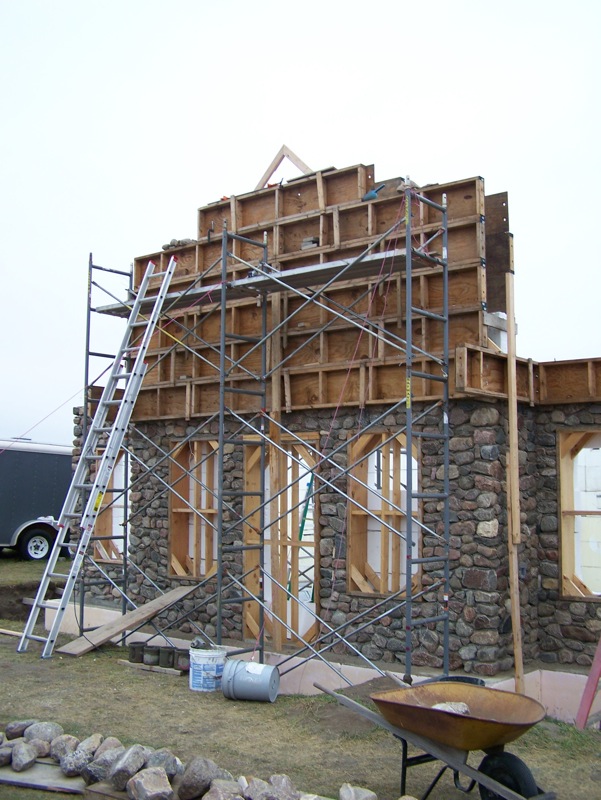
Today we began putting the GluLam beams into the pockets we made in the walls. FYI, if you need to make box outs for beam pockets in a concrete wall, don't use wood. If I had to do it all over again, I would try foam. The wood was jammed in there tight even though we oiled them before their use. It took us a long time to remove them.

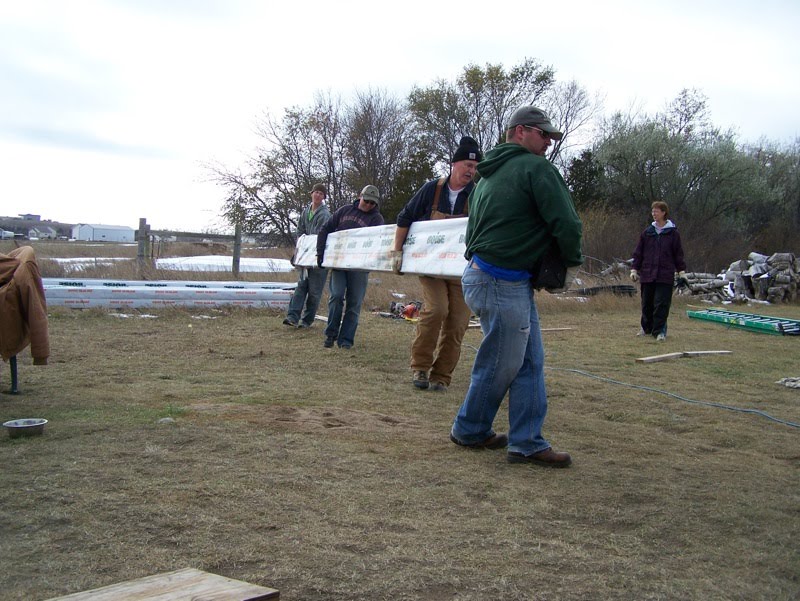
With the help of good friends with strong backs, we picked up each beam and hefted them into place.


We wrapped the ends that would be inside the wall with roofing felt to protect them from condensation that can occur when wood comes into contact with concrete in the right conditions. We left the plastic wrap on to protect them from precipitation until the roof goes up.

Jenn was a master at stapling the felt on after wrapping them in Christmas present fashion.

We got 5 of the eight beams into place, we'll finish the rest tomorrow. There are four 21 footers and four 24 footers. We estimate that they weigh in at about 500 pounds or so. We were tired and very thankful for the help that showed up. Stay tuned for the reveal of the south gable.

Tuesday, October 26, 2010

The South Gable

After we finished all the stone work on the first floor. The only stone work left was the peak on the south side that extends up to the second floor. Due to the weather getting colder, we considered doing the peak in wood frame. Ultimately we couldn’t decide on a facing material that would equal the beauty of the stone. So stone it is. We also took a time out while the weather was warm to do some prep work on the back filling.

The peak went as fast as I expected it too, which was a comforting change to how things usually go.

We are using buckets and rope to get the rocks and concrete to the top.


The speed picked up even more after a surprise visit from my Aunt and Uncle. Thanks!


We are really racing the clock at this point. Not only are the temperatures getting colder, we also have much shorter evenings. Needless to say, we are very eager to set the last stone. We are very close to being able to put a roof on and make it weather tight.

Monday, October 18, 2010

The Process

I’ve been promising a few pictures of our actual stone laying process for a while now, and haven’t delivered. We are getting closer and closer to completion, so I figured I better snap a few.

Set the rocks.


Sand to a depth of about 1 inch. Poke holes in the sand marking the joints.


Cover with concrete.


The next set of rocks ideally covers the previous joints, using what masons call the “two over one, one over two” technique. Just like bricks.

We're living on borrowed time in our ND, fall climate - but we're getting close to being done with masonry work. More about that next time.