Wednesday, December 28, 2011

Masonry Heater Part I

Our latest project is the masonry heater. I've been excited to start building this monument since day one. We are building a 22" finnish contraflow. If you are unfamiliar with masonry heaters, think of it as a fireplace with a lot of mass and a flue that winds about a bit before leaving out the roof of your house. The mass is for heat storage and the winding flue is for gathering up all that heat. It is one of the most efficient ways of burning wood.

Here is our account thus far. The first thing we did was to make some molds in order to pre-cast a few pieces of the heater. A masonry heater burns really hot. So to make the pre-cast pieces we needed to purchase what is called castable refractory cement. When all is said and done it is basically a concrete with a very high heat tolerance.

We ended up using two different types of castable refractory - Harbison Walker KS-4 and Alsey Hi-cast. I prefer the Alsey. It seemed much more workable.

The molds were made out of lumber, but we had to take extra care to make them water tight. Castable refractory (and common concrete) get their strength by curing; the slower the better. So in order to make our molds water tight we wrapped the interior surface with house wrap tape, stapled on plastic and mounted them to a plywood sheet. A side note, use heavier plastic than painters plastic. It tears too easy.
After they were mounted, a bead of silicone was applied to all the seams.
We had to pour the slabs in my garage since the castable refractory is temperature sensitive. This was a very messy experience.

After the refractory was poured into each mold, we vibrated it by putting a piece of scrap lumber up against the mold and beating on it with a hammer drill. This proved very effective for those of us with limited tools.
After each piece was poured, they were covered with plastic to cure.
Three bake oven slabs, two capping slabs and one hearth slab.
This is the base slab laid in place in a bed of common mortar. The base slab is not refractory. It is 3 parts vermiculite to 1 part portland cement. FYI vermiculite concrete cures extremely slow.
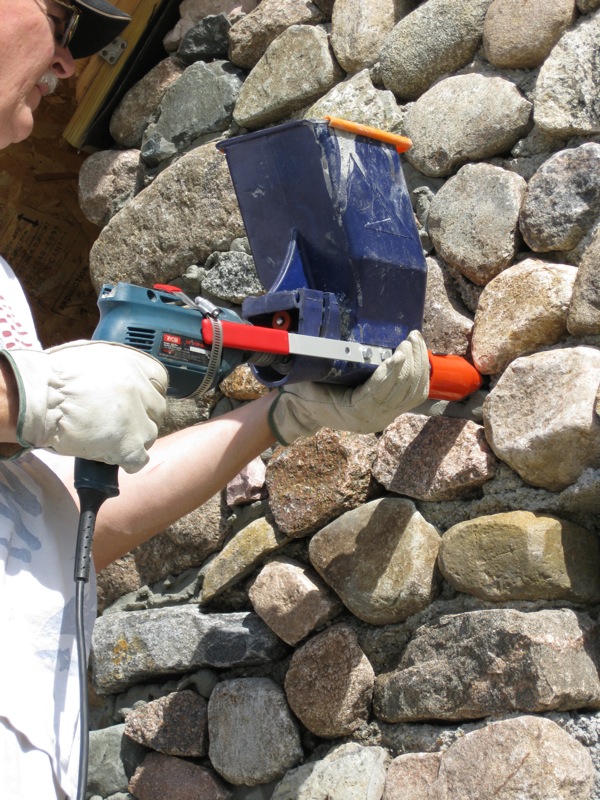
The following photos are a course by course synopsis of the progress so far. All joints are thin and laid with refractory cement - Meeco's Red Devil (because of availability)
The space in the front middle is the where the ash box is located. The hole in the back is where the flue connection is. The two side holes are clean outs for the side flue channels.
This picture shows a port I left open in order to try to have an under fire air source to speed up the hot coals phase of the fire. It is something I read about here, but wasn't included in the plans I purchased here.
Hearth floor with ash drop.
Firebox outer shell.
Expansion joint in the rear of firebox.
Firebox inner shell.
This is the progress so far. When I am completely done, I plan to compile the total photo sequence into one link to try to make things easier for anyone building the same heater.

Saturday, November 26, 2011

We Do Acid

I can't wait to see what kind of traffic the title of this blog draws. Over the past week we have tackled the acid staining of our concrete floor.

Parts of the project were as easy as I thought they would be, and other parts were much more difficult. I'll start from the beginning.

We used kona brown colored stain from Butterfield - mainly because I could get it locally. Most experts recommend doing a test spot in an inconspicuous area. So we did. Our test spot revealed a color we liked and gave us the confidence to continue.

We started by moving everything out of the room.
This is the first time we could see this much of the floor in months. Then we masked off the walls with some leftover landscaping plastic.
Next, we cleaned the floor and cleaned the floor and cleaned the floor. We used a CHO concrete cleaner that also came from Butterfield. I would not recommend this cleaner unless you have really old or dirty concrete. The cleaner needs to be neutralized with a solution of baking soda and water, which was the start of our problems. We must have scrubbed and wet vac'd the floor a half dozen times trying to clean up the remaining residue.  If I had it to do over again, I would use something like 'simple green' or another degreaser style detergent.

Once we were finally done cleaning the concrete, it was time to do some acid. I mean stain the floor. We used a hand pump sprayer, just like a garden sprayer. The manufacturer warns you not to use a sprayer with metal parts. I don't know what will happen, but I envision a MacGyver style explosion. Laying the stain down is pretty simple. You just work your way out of the room and let it dry.

Here is another mistake I made that you don't have to. Make sure your stain is completely dry before you neutralize it. It will save you some clean up time. The stuff that is still a bit wet contaminates your clean up solution and makes cleaning up take longer. It may also make some designs you aren't happy with. After it is completely dry, you need to neutralize it with a solution of baking soda and water. Then you need to work your tail off trying to clean up the baking soda residue with clean water - before the residue drys on the surface.

We ended up doing a second coat, mostly to hide some of the mistakes I made when I washed my stain off too early - but partially because we wanted a darker shade.
When all is stained you need to seal your creation.
The sealer we used was also from Butterfield. It is solvent based and very nasty stuff. Get in, get it sealed and get out. Make sure to follow the directions on the can. For example, ours said that it is highly flammable and temperature sensitive. Two things that could have made everything go horribly wrong. We used two coats of sealer followed by three coats of Halloway House floor finish. Even though mistakes were made, we couldn't be happier with our floor.
This last picture is a teaser for the next blog post.

Sunday, September 18, 2011

The End of Tuckpointing

The tuckpointing is finished! It was an ongoing project for the bulk of the summer and today my wife finished off the last bit. The pointing ended exactly where the slipforming ended last year - the south peak.
We are ecstatic that we can move on from another very large project. Hats off to my wife and my mom for doing all the tooling.
Today we also started putting trim around the windows.
And on Saturday ... watermelon harvest!

Wednesday, August 31, 2011

Closed Cell Spray Foam

This week we hired a crew to spray in closed cell spray foam. It was an expensive option, but it was a lifetime choice. It doesn't settle, compress, take on water or mold (according to research). Also, it fills in all air gaps. Today was the first day after insulation, and the upstairs was noticeably cooler. I think we will be happy we chose it.
 
In poplar news, the Op-367s either look like this
 or this.
The larger ones are doing great. The smaller ones are starting to succumb to the grasshopper plague. Also, because of the house building we didn't plant them all at the same time ... or the right time. Another thing that I started doing about mid-summer (should have been earlier) is spray deer repellent on them regularly. It seems to be helping.

One last tidbit. We found another little friend.
This marks the 4th species of snake we've found on our property. This is called a smooth green snake (a highly original name). It was wicked fast. Pretty cool.

Sunday, August 14, 2011

Tuckpointing

Amongst other things, we have been spending a lot of time tuckpointing the joints between stones. We started out doing this by hand, which proved to be a painfully slow process. Then we tried a grout bag, which we never got the hang of. While doing an internet search, my Mom found this little gem - the quikpoint mortar gun. We were hesitant to buy it because of the expense of a tool we weren't sure would work for us. After I called the company I was convinced we should buy it. They were very courteous and seemed to sincerely want their product to work for us.

This tool has greatly increased our speed. I would highly recommend purchasing one if you have a lot of pointing to do and not a lot of skill. Here is our process.

Stones in the wall.
Errant concrete chipped out of the joints with a rock hammer.
Joints filled with mortar gun. We have been using quikrete's mason mix mixed with Gibco's MRF. You can find information about Gibco's plasticizer on the quikpoint website.
Tool the joints with hi-tech pointing tools (bent butter knives).
Voila! The unskilled mason's solution to pointing a stone wall.
 We also (finally) finished putting in windows. The last window we installed was the arched one on our south peak. In order to make the arched buck, my dad cut arches out of treated plywood and sandwiched them together. To our surprise, it actually went in quite well.

Monday, July 25, 2011

More Windows

While working on the tuck point (blog to come), we have been working on a handful of smaller projects. One of which was cutting in some windows. Up until this point, we had never framed a window into a wooden opening. We had only put windows into concrete openings. Once we figured out the first window, the second one went in pretty easily. We found our instructions online, so I’m not going to go into detail on how to do it. It is fairly straight forward although, just like everything else it comes with its own terminology – king studs, jack studs, cripples etc.
We are about 2/5 done with the tuck pointing, but I am taking pictures of each stage on one section of wall that isn’t done yet. We should be done with that soon and then I will relay the results.

Thursday, June 30, 2011

We Finished Shingling

In the interest of saving our sanity, we decided to rent a lift in order to finally finish shingling. We finished this project about a week and a half ago but I am just now getting around to blogging about it.

Let me tell you, this is a project I won't miss. By the by, shingling from the lift greatly improved our shingling speed. A big thanks to my Dad for helping us put the shingles on our roof. He is a apparently a glutton for punishment.