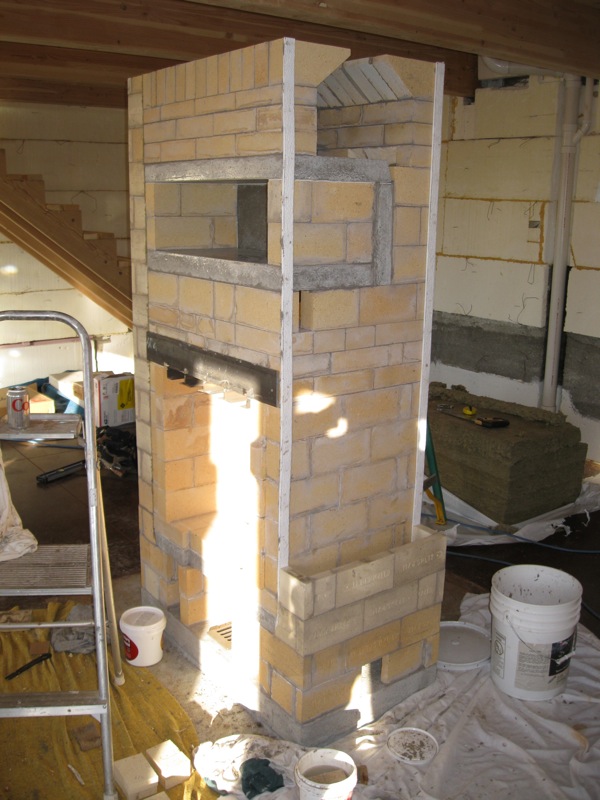
My 22" finnish contraflow heater core is finished. It probably isn't precision perfect, but considering I had never laid a brick before in my life; I'm pretty pleased with the outcome. The pictures below are my course by course outline (save for a couple courses I forgot to photograph).
I decided after I had the corners of the transition header in place, I would mortar four of the bricks together before I put them up. It worked fairly well except I was getting to the bottom of my mortar and a few hard chucks of mortar threw a couple bricks off kilter. Lesson learned.
Header bricks in place.
I only did a course by course of one side channel since they are both the same. This is the left side channel finished. It is worth mentioning that I used mineral wool on one side and ceramic paper on the other side. There were pros and cons of each, but overall I would probably use the ceramic paper again if it is available.
Course by course of the right side channel (ceramic wool gasket - 2 thicknesses of 1/8" paper).
This is a picture of the bond pattern. Each course contained a 4 3/4", 3 1/8", 3 3/8" and 2 full bricks.
1/8" ceramic paper gasket on the top. The pre cast capping slabs go on next. We did get them on with only two people but a third person would have been nice.
Capping slabs in place. Voila! Remember when I said that a couple transition header bricks got a little kittywampus. Those rogue bricks made it so the slabs had some air gaps in some locations. I remedied the situation by stuffing in chunks of mineral wool.
You can see the unevenness of the header bricks in this picture.
The ratchet strap was put on so the side channels wouldn't move while we were putting on the capping slabs. The side channels sit dry up against the ceramic paper gasket.
Now I just need to figure out the chimney and put the facing on. Excitement ensues!